- Published on
How to install Magento 2 on Macbook M1 (Apple Silicon).
- Authors

- Name
- Tat Tran
- @tattran22
Overview
Install Homebrew
The Package Manager for macOS.
macOS Requirements
- A 64-bit Intel CPU or Apple Silicon CPU
- macOS Mojave (10.14) (or higher)
- Command Line Tools (CLT) for Xcode:
xcode-select --install, developer.apple.com/downloads or Xcode - A Bourne-compatible shell for installation (e.g. bash or zsh)
/bin/bash -c "$(curl -fsSL https://raw.githubusercontent.com/Homebrew/install/HEAD/install.sh)"
Homebrew installs packages to their own directory and then symlinks their files into /usr/local for macOS Intel, /opt/homebrew for Apple Silicon.
Install Git
Git is a free and open source distributed version control system designed to handle everything from small to very large projects with speed and efficiency.
brew install git
That will install latest version of git.
Install MYSQL
brew install mysql
You can now start the MySQL server by running:
brew services start mysql
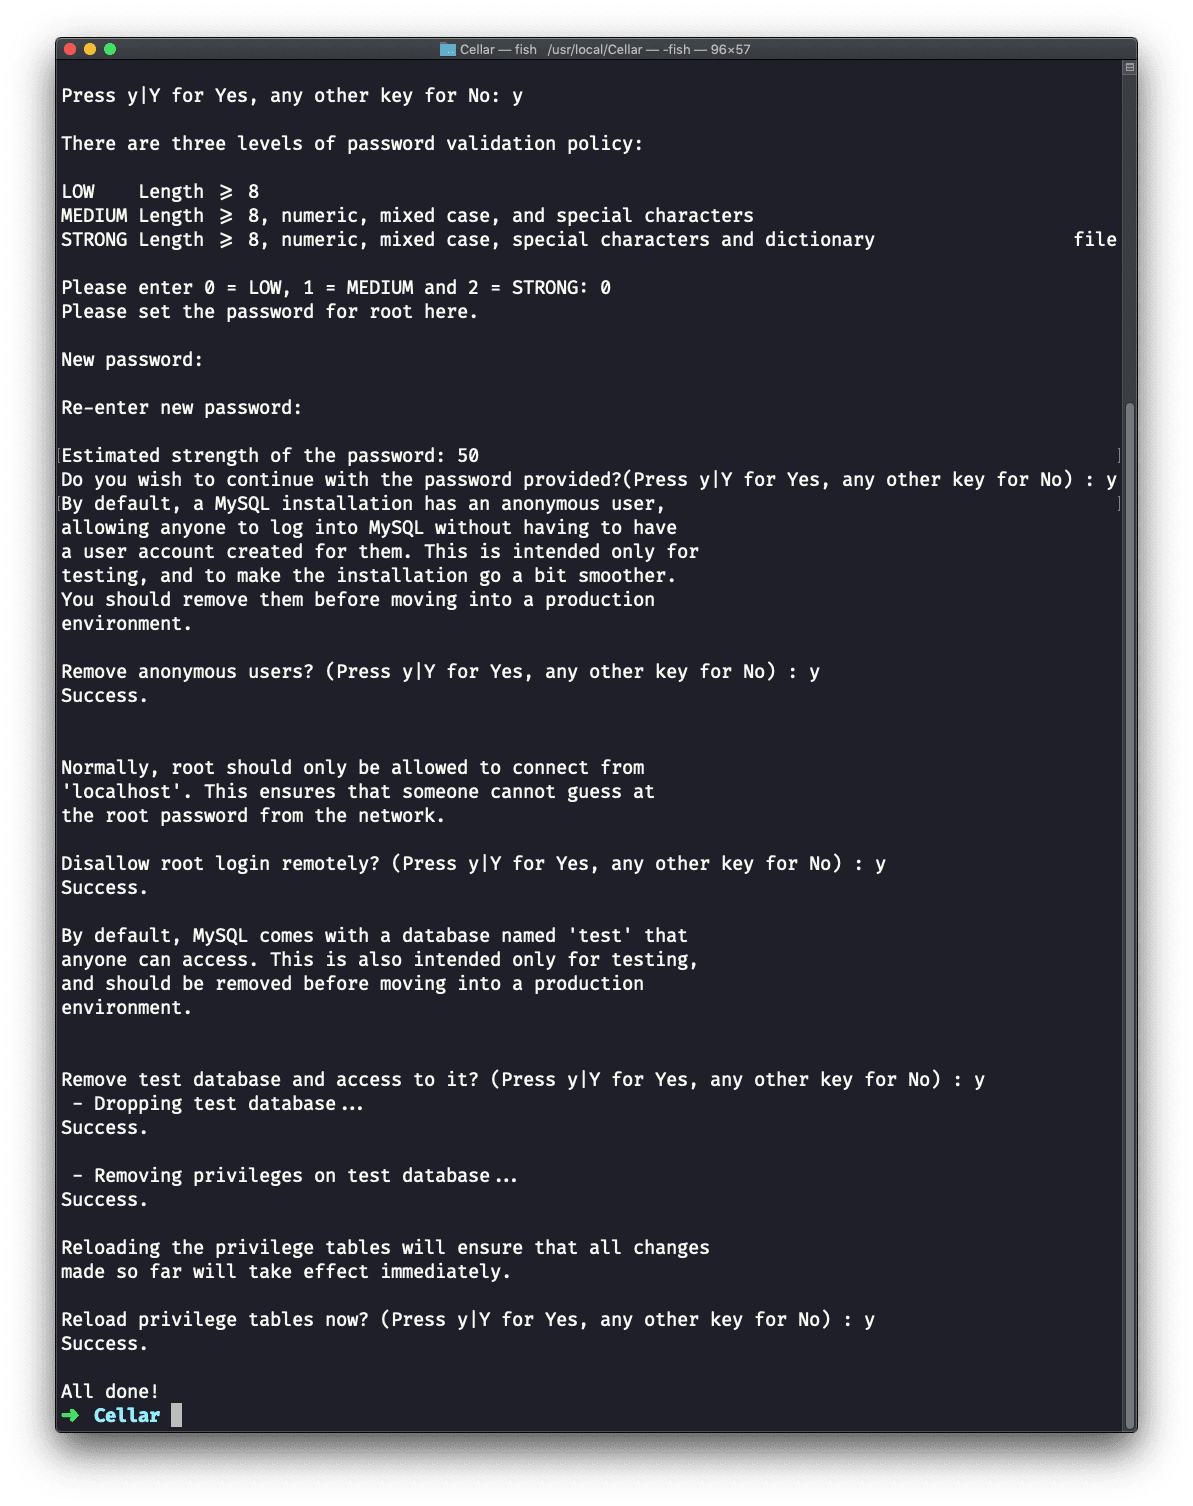
Now we need to secure the MySQL server. By default the server comes without a root password, so we need to make sure it’s protected.
Run:
mysql_secure_installation
The procedure can take a while, but it gives a lot of power to make sure you get the best defaults out of the box:

Since we used brew services start mysql to start MySQL, your Mac will re-start it at reboot. You can run:
brew services stop mysql
to stop this from happening, and also to immediately stop MySQL.
You can also avoid this daemon mode (that’s what we call programs that always run in the background and restart when the computer is restarted) by running:
mysql.server start
This will start MySQL and will keep it running until the computer is shut down, or until you run:
mysql.server stop
and it will not re-start it at reboot.
It’s up to you to decide which one you prefer.
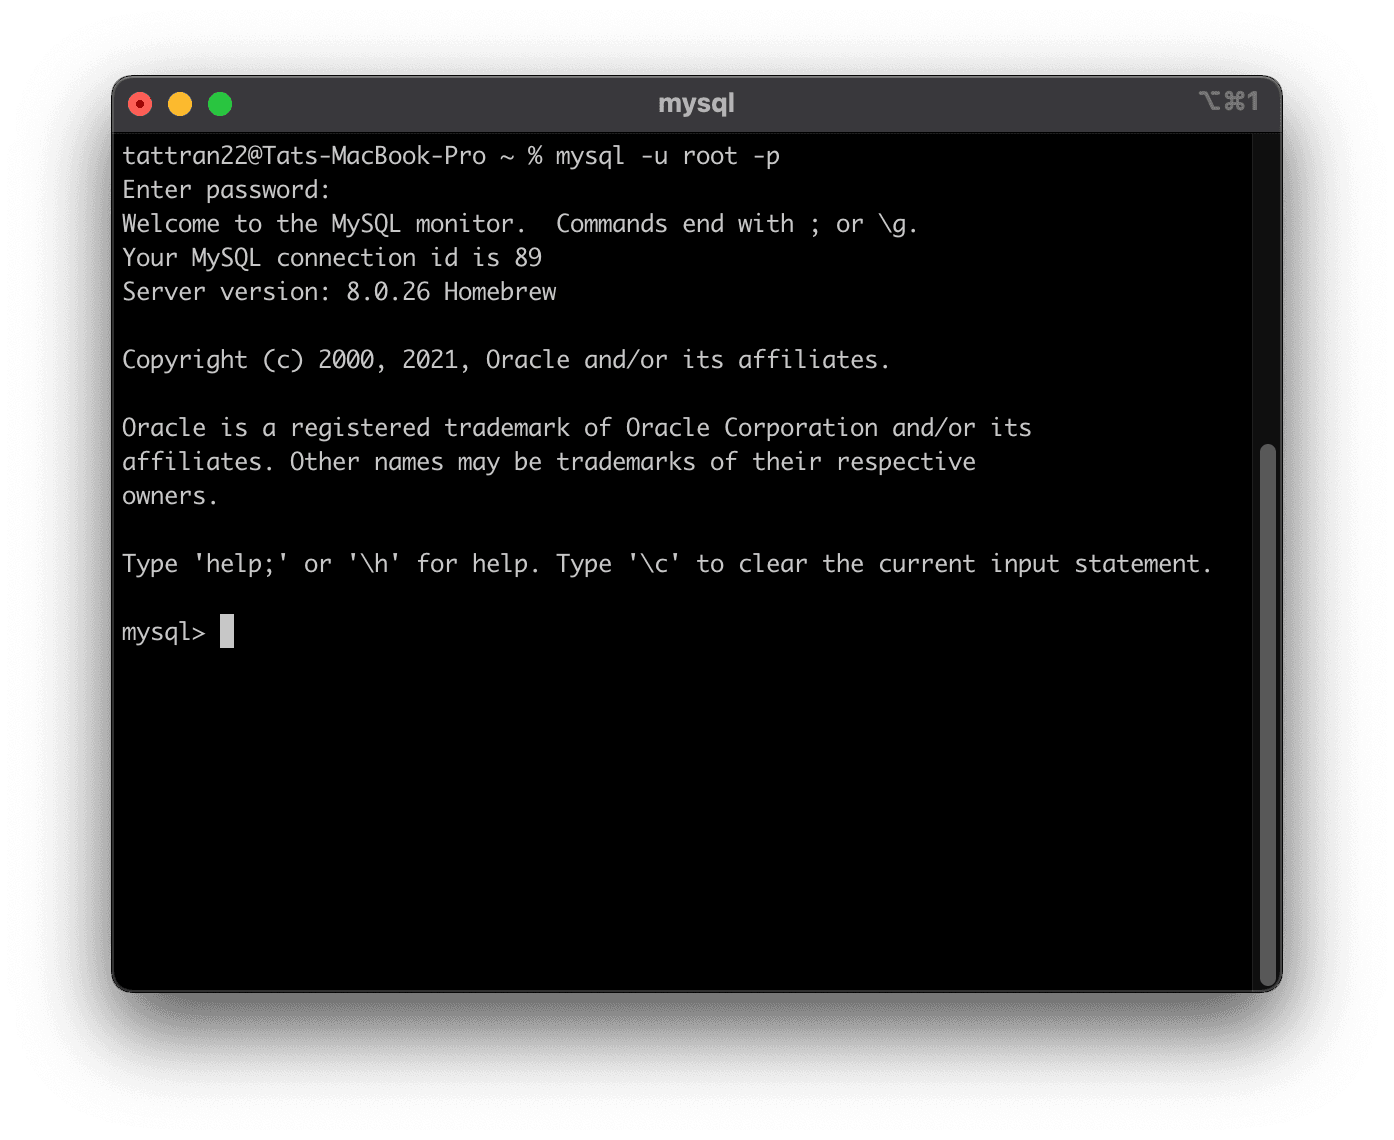
Now you can connect to the server using the command:
mysql -u root -p
You will need to type the root user password after you run this command, and once you are done you should see this screen:

Configuring the Magento database instance
This section discusses how to create a new database instance for Magento. Although a new database instance is recommended, you can optionally install Magento into an existing database instance.
To configure a MySQL database instance:
Log in to your database server as any user. Get to a MySQL command prompt:
mysql -u root -p
Enter the MySQL root user’s password when prompted. Enter the following commands in the order shown to create a database instance named mage2ce with username magento:
create database mage2ce;
create user 'magento'@'localhost' IDENTIFIED BY 'magento';
GRANT ALL ON mage2ce.* TO 'magento'@'localhost';
flush privileges;
Enter exit to quit the command prompt.
Install PHP
brew install [email protected]
Verify PHP is installed
Most flavors of Linux have PHP installed by default. This topic assumes that you have already installed PHP. To verify if PHP is installed already, in the command line, type:
php -v
If PHP is installed, a message similar to the following displays:
PHP 7.4.21 (cli) (built: Jul 12 2021 03:04:54) ( NTS )
Copyright (c) The PHP Group
Zend Engine v3.4.0, Copyright (c) Zend Technologies
    with Zend OPcache v7.4.21, Copyright (c), by Zend Technologies
Magento 2.4 is compatible with PHP 7.3, but we test with, and recommend using, PHP 7.4.
Check PHP settings
Step 1: Find PHP configuration files
This section discusses how you find the configuration files necessary to update required settings.
- Find
php.iniconfiguration file
To locate the PHP command-line configuration, enter
php --ini | grep "Loaded Configuration File"
- Find OPcache configuration settings PHP OPcache settings are typically located either in php.ini or opcache.ini. The location might depend on your operating system and PHP version. The OPcache configuration file might have an opcache section or settings like opcache.enable.
Use the following guidelines to find it:
- Nginx web server:
OPcache settings are typically located in /opt/homebrew/etc/php/7.4/conf.d/ext-opcache.ini
If not, use the following command to locate it:
sudo find / -name 'opcache.ini'
PHP-FPM: /opt/homebrew/etc/php/7.4/php.ini
If you have more than one opcache.ini, modify all of them.
Step 2: How to set PHP options
To set PHP options:
- Open a php.ini in a text editor.
- Locate your server’s time zone in the available time zone settings
- Locate the following setting and uncomment it if necessary:
date.timezone =
- Add the time zone setting you found in step 2.
- Change the value of memory_limit to one of the values recommended at the beginning of this section. For example,
memory_limit=2G
- Add or update the realpath_cache configuration to match the following values:
;
; Increase realpath cache size
;
realpath_cache_size = 10M

;
; Increase realpath cache ttl
;
realpath_cache_ttl = 7200
- Save your changes and exit the text editor.
- Open the other php.ini (if they are different) and make the same changes in it.
Step 3: Set OPcache options
To set opcache.ini options:
- Open your OPcache configuration file in a text editor:
- Locate
opcache.save_commentsand uncomment it if necessary. - Make sure its value is set to 1.
- Save your changes and exit the text editor.
Install Nginx
brew install nginx
Start Nginx service by running:
brew services start nginx
Install Composer
brew install composer
Check the version of Composer installed by running:
composer -V
You will see the version and build information of Composer installed.
Composer version 2.1.5 2021-07-23 10:35:47
Install Elasticsearch
Install Rosetta
You must install Rosetta 2 as some binaries are still Darwin/AMD64. To install Rosetta 2 manually from the command line, run the following command:
softwareupdate --install-rosetta
To install with Homebrew, you first need to tap the Elastic Homebrew repository:
brew tap elastic/tap
Once you’ve tapped the Elastic Homebrew repo, you can use brew install to install the latest version of Elasticsearch:
Obtaining Elasticsearch for Docker is as simple as issuing a docker pull command against the Elastic Docker registry. We will install Elasticsearch version 7.9.3 because this is the highest version that Magento supports.
brew install elastic/tap/elasticsearch-full
Config files locationedit Elasticsearch has three configuration files:
- elasticsearch.yml for configuring Elasticsearch
- jvm.options for configuring Elasticsearch JVM settings
- log4j2.properties for configuring Elasticsearch logging
Start Elasticsearch service by running the following command:
brew services start elastic/tap/elasticsearch-full
The image exposes TCP ports 9200 and 9300
Install Magento 2
We first need to navigate to the web directory of our web server:
cd /opt/homebrew/var/www
Create a new Composer project using the Magento Open Source or Adobe Commerce metapackage.
composer create-project --repository-url=https://repo.magento.com/ magento/project-community-edition mage2ce
When prompted, enter your Magento authentication keys. Public and private keys are created and configured in your Magento Marketplace.
Install Magento
You must use the command line to install Magento.
This example assumes that the Magento install directory is named mage2ce, the db-host is on the same machine (localhost), and that the db-name, db-user, and db-password are all magento:
bin/magento setup:install \
--base-url="http://mage2ce.local/" \
--db-host=localhost \
--db-name=mage2ce \
--db-user='root' \
--db-password=123456 \
--admin-firstname="Admin" \
--admin-lastname="admin" \
--admin-email=[email protected] \
--admin-user=admin \
--admin-password=admin123 \
--language=en_US \
--currency=USD \
--timezone=Asia/Ho_Chi_Minh \
--use-rewrites=1 \
--backend-frontname="admin" \
--search-engine=elasticsearch7 \
--elasticsearch-host=localhost \
--elasticsearch-port=9200
Messages similar to the following display to indicate a successful installation:
Post installation file permissions check...
For security, remove write permissions from these directories: '/opt/homebrew/var/www/mage2ce/app/etc'
[Progress: 274 / 274]
[SUCCESS]: Magento installation complete.
[SUCCESS]: Admin Panel URI: /admin
Create configuration file for Nginx with path /opt/homebrew/etc/nginx/servers/mage2ce.local.config
upstream fastcgi_backend {
  server   127.0.0.1:9074;
}

server {
    listen 80;
    server_name mage2ce.local;
    set $MAGE_ROOT /opt/homebrew/var/www/mage2ce;
    set $MAGE_MODE developer;

    error_log /opt/homebrew/var/www/mage2ce/var/log/mage2ce.local-error.log;
    include /opt/homebrew/var/www/mage2ce/nginx.conf.sample;
}
Check syntax of the configuration file of Nginx by running:
nginx -t
Reload the configuration file by running:
nginx -s reload
Restart Nginx server by running:
brew services restart nginx
We need to edit the hosts file so that the mage2ce.local domain can run on the local machine.
sudo nano /etc/hosts
Add the following line:
127.0.0.1 mage2ce.local
Switch to Developer Mode
It’s time to switch Magento to Developer Mode. Magento has 3 modes, all designed to use optimal settings based on your usage. In Developer Mode, you can access more tools in the backend of Magento than any other mode. I’ve covered these Modes in more depth video that you’ll find on the channel
Switch modes using
bin/magento deploy:mode:set developer
Clear the cached generated folders
rm -rf generated/metadata/* generated/code/*
Clear the remaining cache
bin/magento cache:clean
Verify the installation
Go to the storefront in a web browser. For example, if your Magento installation base URL is http://mage2ce.local/, enter it in your browser’s address or location bar.
The following figure shows a sample storefront page. If it displays as follows, your installation was a success! 
Download Sample Data via Composer
Magento has a really useful command for installing all of the sample data from the Magento Repository via Composer. This step can normally take a couple of minutes to complete. At times, it may appear that nothing is happening, but just give it time.
The the Sample Data installation script
bin/magento sampledata:deploy
It’s been a couple of minutes and now Putty is awaiting our next command. We need to tell Magento to install the latest changes we’ve just made [44:14]
bin/magento setup:upgrade
Verify the storefront (with optional sample data) Go to the storefront in a web browser. For example, if your Magento installation base URL is http://mage2ce.local/, enter it in your browser’s address or location bar.
The following figure shows a sample storefront page. If it displays as follows, your installation was a success! 